Happy Monday + Happy August! How was your weekend? Mine (Emma here!) was great! I did some housework, gardening, worked on a very special secret project, went on a date with my husband to see Crazy, Stupid, Love (I give it both the movie and its soundtrack 5 stars – such a cute movie) and enjoyed some fun + sun on the beach. I hope your weekend was fabulous, too. :)
To kick off the first day of a brand spankin’ new month + the first day of a new week, we’re showcasing DIY bunting favors! This darling DIY project is exclusively for Emmaline Bride readers brought to you by Lauren of Lauren Elise Crafted. Enjoy!
DIY Bunting Favors
by Lauren
Hi Emmaline Bride readers! Lauren Elise here and I am excited to be sharing a DIY for favor bags today. This project is actually a two in one so not only will I be teaching you how to make cute treat bags but also how to make fabric pins that your guests can wear and keep as a memento from your day. To be festive, I created a bunting stamp but you could stamp anything you wanted onto your fabric to personalize the pins to your specific event.
I used two different kits for this DIY, a stamp carving kit and a button kit. There appears to be a handful of steps but each kit is actually very simple and after a practice run (or two!), you should be well on your way to making your own stamps and buttons.
Happy crafting! And when you are done with this project, you can continue to use the stamp carving kit to make more of your own personal stamps. You will be able to embellish paper goods and favors for all kinds of projects in the future. Enjoy!
Materials ::
○ Speedball Speedy-Carve Basic Stamp Making Kit
○ Dritz Button Cover Kit – mine was size 45, 1⅛”
○ pencil
○ natural colored fabric – I used drill fabric but you could also use muslin or twill
○ rubber stamp ink pad or pen in brown
○ patterned cotton fabric
○ super glue pen
○ ribbon in 3 different colors
○ scissors
○ tacky glue
○ Darice tie tacks – I found mine in the jewelry section of JoAnn Fabrics
○ muslin bag
○ rubber stamp alphabet kit – mine was Creative Café Casual Alphabet Set
Directions ::
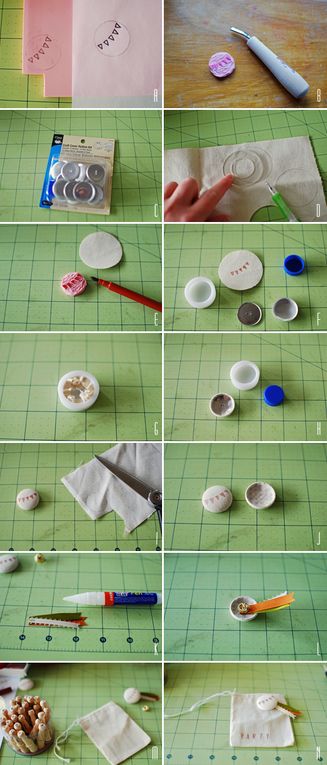
○ Use the Speedball Carving Kit to make a bunting rubber stamp. Follow the directions provided in the kit for more stamp making advice. Use the trace paper provided in the kit to transfer your drawing to the pink carving block {image A}. The size of your bunting will depend on the size of the buttons you use, mine were 1⅛”. The button kit comes with a template.
○ Use the provided gouges in the kit to carve away the block around the stamp {image B}.
○ Use the template in the button kit {image C} to trace circles on your drill fabric {image D}. Cut out the circles.
○ Put ink onto your bunting stamp, either with an ink pad or pen, and stamp onto the fabric circle {image E}. Place the stamp in the middle of the circle. Use the provided tools in the button kit to make your button {image F}.
○ Follow the directions that come with the button kit for more detail. Place your fabric, bunting facing down, over the plastic mold. Place a button shell over the fabric and press both into the mold with the blue pusher tool {image G}. Tuck the fabric into the shell. Press a back into the mold and snap into place with the pusher {image H}.
○ Use the template again to draw smaller circles onto patterned cotton fabric {image I}. Cut the circle out and glue to the back of the pin with tacky glue {image J}. Provide plenty of time to dry.
○ Cut three pieces of ribbon, about 2” in length (I varied the lengths slightly) and glue together with a super glue pen {image K}. Glue the ribbons to the back of the pin and then glue a tie tack on top, all using super glue {image L}.
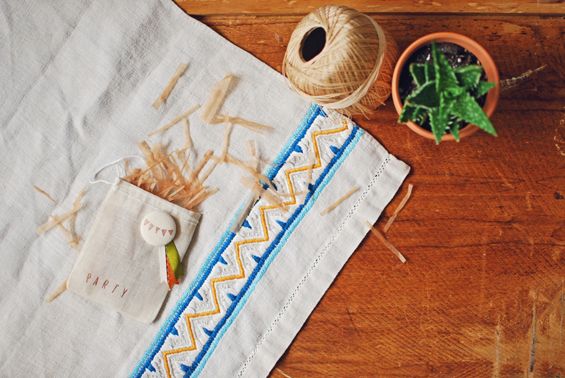
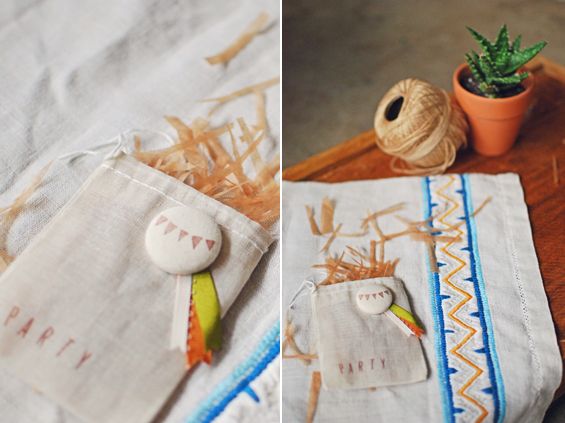
○ Use the stamp alphabet kit {image M} to spell out “PARTY” and stamp onto the muslin bag. Finally, pin the fabric button onto the muslin bag {image N}. Fill with confetti or treats and enjoy!
*It has been a pleasure to be here with you today! If you have any questions about anything I have made, please feel free to contact me through my blog. I am also available to make anything you see. If you are interested in custom, handmade favors or details, please get in touch because I would love to craft something special for you.
-Lauren
–
We hope you enjoyed the DIY bunting favors! We have more inspiration coming up soon including a jaw-dropping DIY real wedding you won’t want to miss! (Sign up for the RSS feed so you don’t miss a beat!)
xo,
-E.


7 comments
love this idea :X
Thanks for the sweet comments everyone! I am such a sucker for anything bunting…it always looks cute!
love this idea! wonderful!!
Cute!
Love those!! What a great project!
What a darling project, Lauren! It makes me happy! {A}
so creative!!
xoxo, chrissy
The Perfect Palette
Comments are closed.